This post outlines the process to replace a Tuya radio module with one running ESPHome to fully control a heated mattress pad locally with Home Assistant.
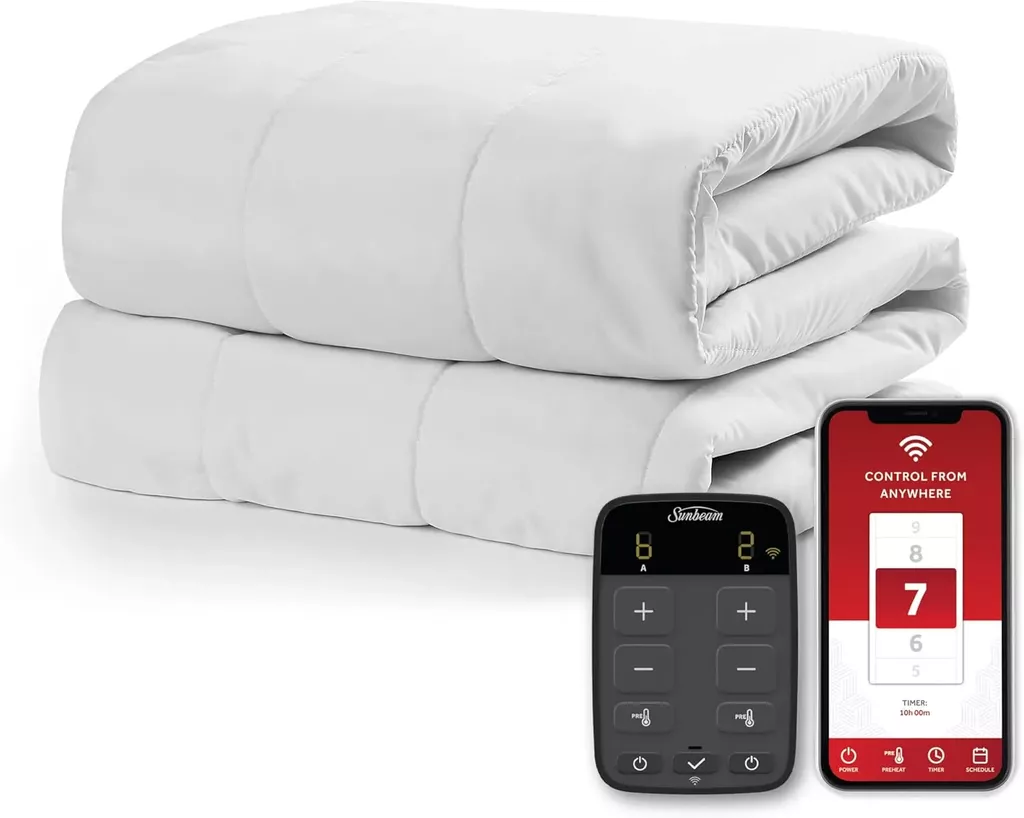
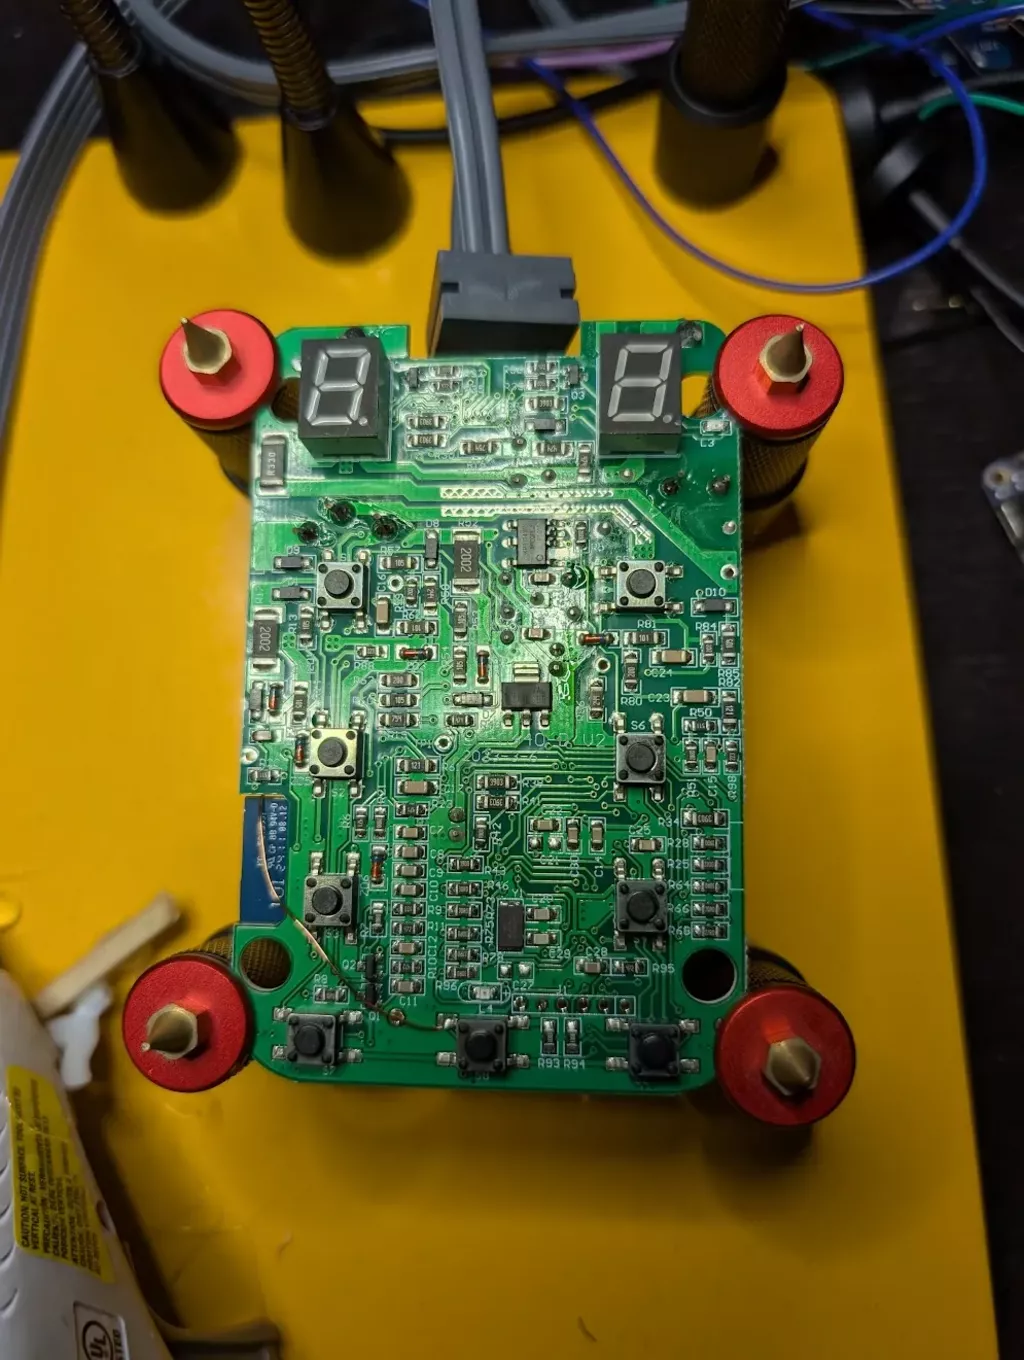
I purchased a Sunbeam Heated Mattress Pad for those cold winter nights. The mattress pad controller connects to WiFi and has a remote control app. However, it has a safety feature that limits functionality. The app can only adjust heat levels and turn the pad off unless you’ve recently pressed a physical button on the controller, effectively limiting the app to changing heat levels and turning the device off.
I wondered about the usefulness of an app to control your bed temperature when you’re already lying next to the controller’s ON button. But I suppose some people prefer using their phone, which is likely already in hand, rather than reaching for a button on the nightstand.
Local Control
For better security and privacy, I explored ways to control the heated mattress pad through my Home Assistant instance.
The controller uses the Tuya IoT platform, which can integrate with Home Assistant through the unofficial LocalTuya integration. While setup required registering with the Tuya API and initially connecting the device to the Internet, once configured, I could firewall the controller from the Internet while maintaining full control through Home Assistant. This solution worked well for a while.
Custom Firmware
I eventually wanted more comprehensive local control and the ability to fully integrate the device with my other Home Assistant automations. For example, preheating the bed at bedtime when the outside temperature drops below a certain point. This meant bypassing the physical button restriction. I also wanted to remove my reliance on the unofficial LocalTuya integration and use a native integration.
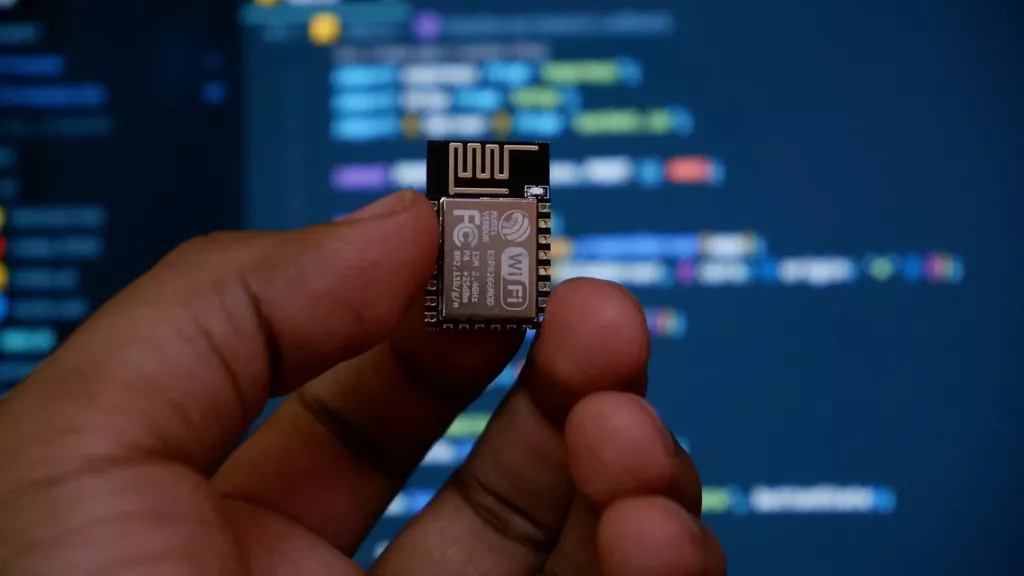
Enter ESPHome, an open source firmware for embedded devices (primarily ESP32 chips, though others are supported) that integrates natively with Home Assistant.
Tuya Architecture
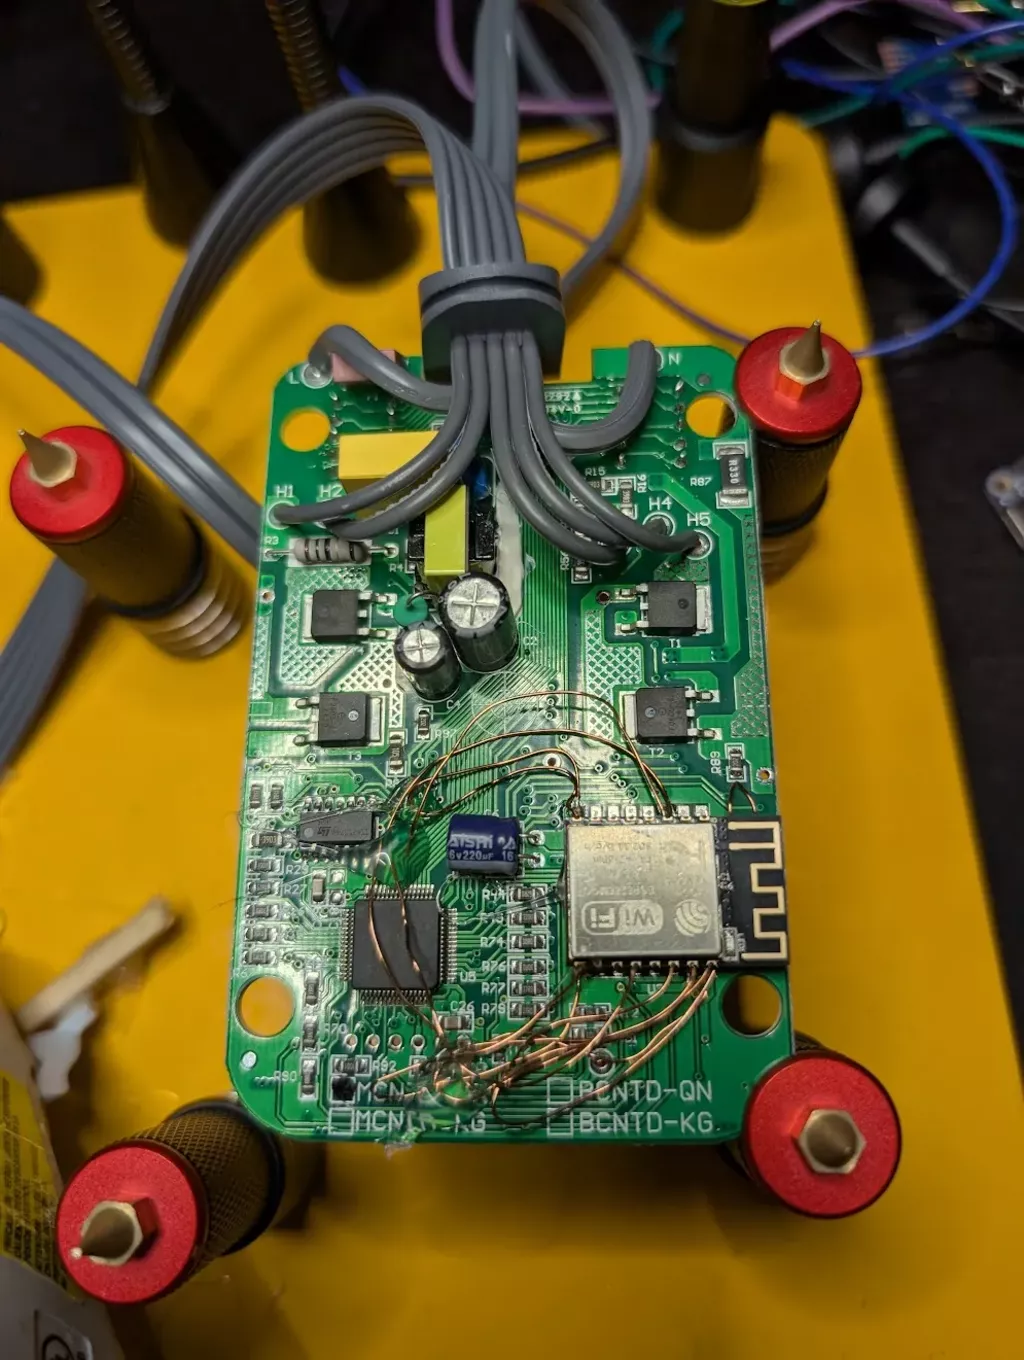
Tuya devices use a two-part system: a main MCU handling device functionality and a separate chip managing WiFi/Bluetooth and cloud operations. These chips communicate via a UART serial protocol.
The mattress pad’s radio MCU is the WBR3. It contains a RTL8720CF chip and supports some third-party firmware through LibreTiny, but not native ESPHome support yet. This meant physically replacing the radio module with an ESPHome-compatible one will be required. While others have replaced Tuya radios before, each device presents unique challenges.
Fortunately, the ESP-12 has an almost identical pinout to the WBR3, making it a suitable replacement. Despite its name, the ESP-12 is actually an ESP8266 chip.
Initial ESP-12 Flashing
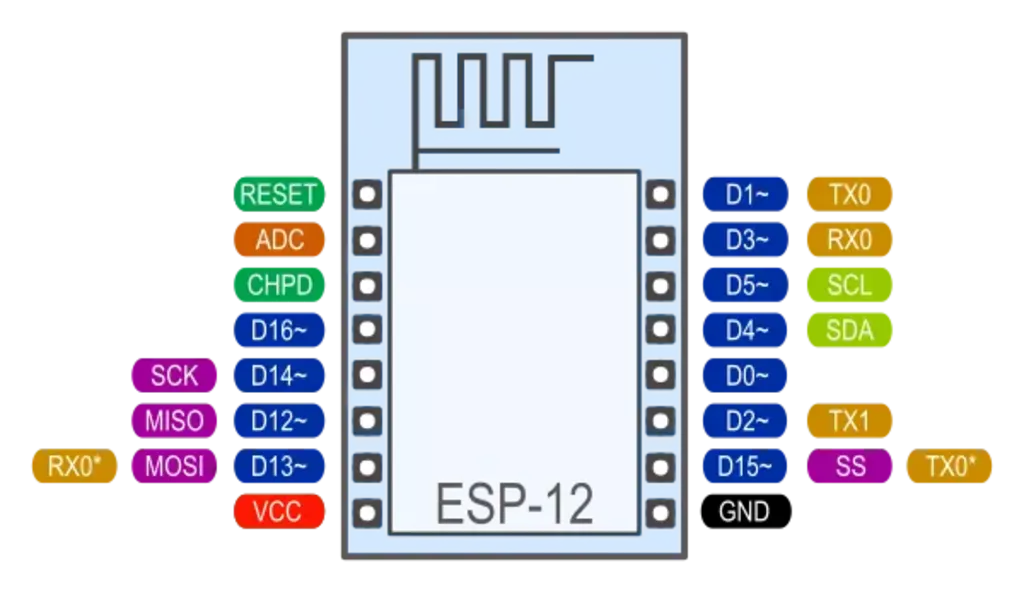
The bare ESP-12 lacks common dev-board features like a USB port, USB-to-Serial chip, boot button, or power regulator. Initial programming requires a specific wiring configuration to a serial adapter, though subsequent updates can be done wirelessly via OTA.
Here’s the required wiring for the initial programming over UART:
[ESP]     [UART]
TX  ------ RX
RX  ------ TX
EN  ------ RTS
GPIO0 ---- DTR
GPIO15 --- GND
GND ------ GND
VCC ------ 3.3v
GPIO15 needs to be pulled to ground for normal operations and for serial programming. So I permanently bridged GPIO15 to the neighboring GND pin.
After connecting the ESP-12 to my USB UART adapter, I flashed a basic minimal ESPHome configuration to enable network connectivity and OTA updates.
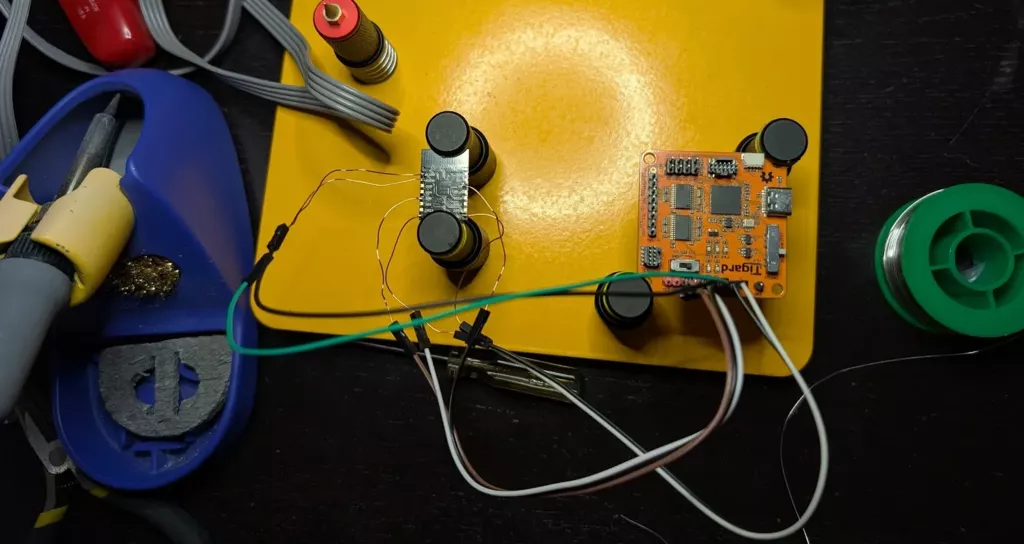
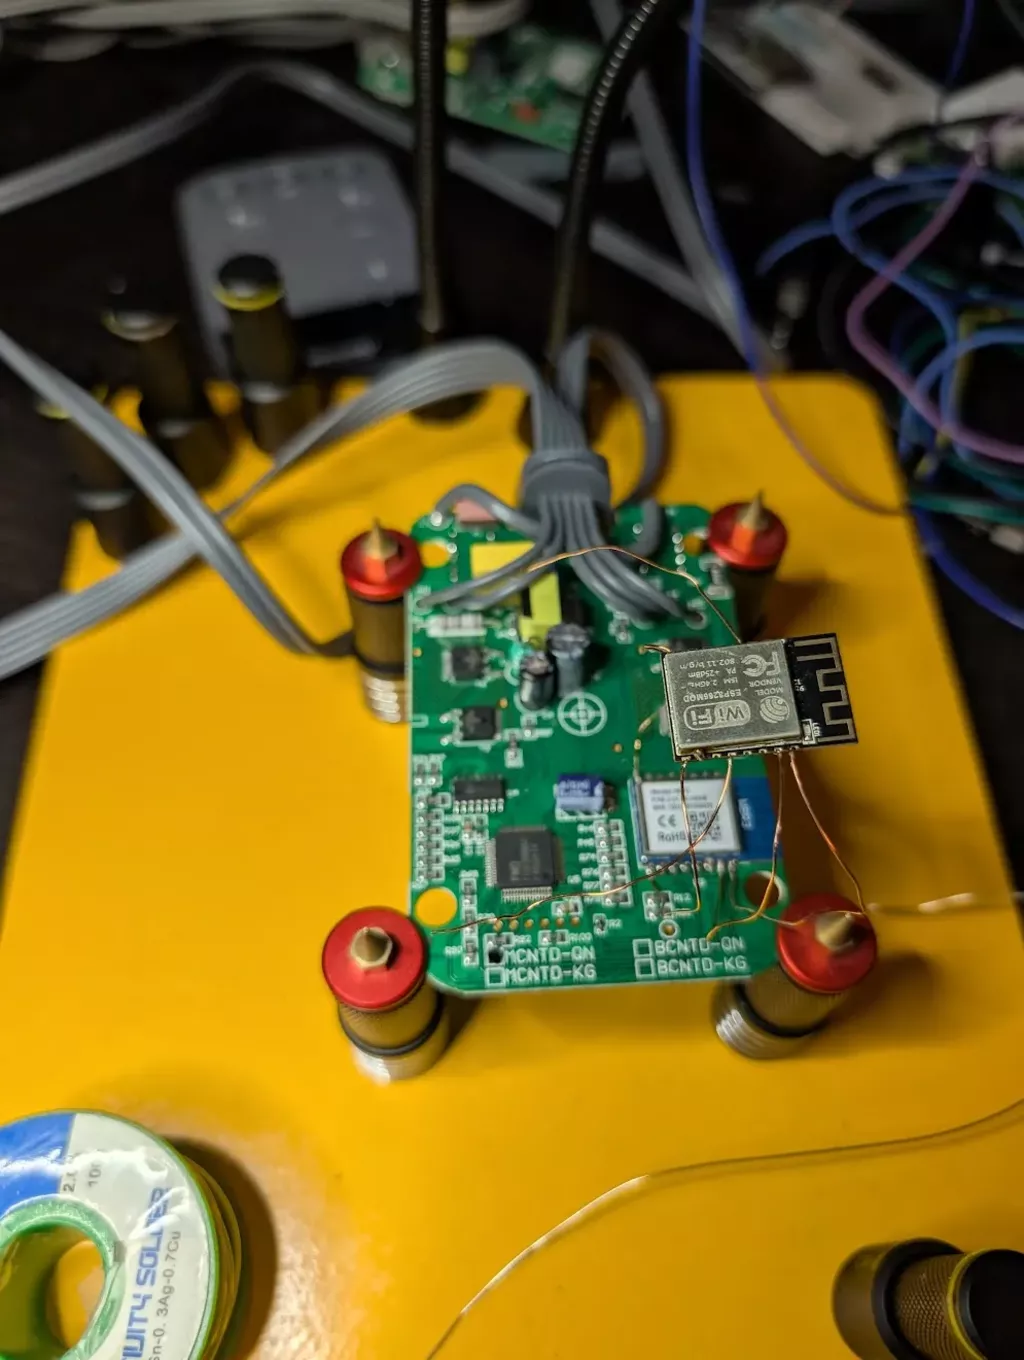
Adding the ESP Radio
Even though the ESP-12 is pin compatible with the WBR3, and can be replaced directly with it, I decided to keep the original Tuya module just in case it was ever needed in the future, and more importantly, remove the risk of breaking something in the desoldering process.
To disable the WBR3 without removing it, I grounded its EN (enable) pin, keeping the WBR3 permanently off and preventing conflicts with the ESP-12 when communicating over the now shared UART.
I then connected the ESP-12 to the UART Tx, Rx, 3.3v, GND, and added a connection from GPIO5 to the presence button on the control panel.
The ESP-12 now effectively replaces the WBR3, handling all UART communication and drawing power from the WBR3’s voltage regulator. As a bonus, it can simulate physical button presses via the GPIO line, bypassing the presence check requirement.
The control unit has the low voltage negative/ground plane connected directly to mains neutral! While this “works” it is considered unsafe and potentially dangerous. This effectively means that when the device is connected to mains AC power, mains current may be flowing through the low voltage components, even when off. Since voltage is relative, they will work just fine as long as nothing else connects to the low voltage components not expecting mains neutral on the ground plane! As a result, if you want to debug with UART, or flash the ESP, you MUST do it with the mains plug fully disconnected! I learned this the hard way. I fried a USB-UART adapter which did not appreciate the mains power surging through it. After this happened I mapped out the traces on the PCB to discover this design flaw. As long as mains power is connected, do not let anything external interact with the device! Ever.
Finally, I secured the new ESP-12 by hot-gluing it directly over the disabled WBR3.
ESPHome Configuration
ESPHome includes a component for the Tuya UART protocol. I just needed to identify the correct data point numbers and types. Fortunately, these matched the data points already used by the LocalTuya integration, and are documented in this Home Assistant Community thread.
To automatically bypass the physical button requirement, I programmed ESPHome to toggle GPIO5, simulating a button press before activating the mattress pad. I also simplified the interface by replacing Tuya’s drop-down menus with more intuitive controls in Home Assistant, such as using a slider for heat levels instead of select menus.
You can view my ESPHome configuration below.
Code
Full ESPHome Config
substitutions:
  node_name: mattress

esphome:
  name: ${node_name}
  friendly_name: Mattress

esp8266:
    board: esp12e # the board is a ESP-12F, but this is close enough

wifi:
  ssid: !secret wifi_name
  password: !secret wifi_password
  ap:
    ssid: ${node_name} AP
    password: !secret hotspot_password

# fallback mechanism for when connecting to the configured WiFi fails.
captive_portal:

# Enable Home Assistant API
api:
  encryption:
    key: !secret api_encryption_key

ota:
  - platform: esphome
    password: !secret ota_password

time:
  - platform: homeassistant
    id: time_hass

logger:
  baud_rate: 0 # (UART logging interferes with tuya)

web_server:
   port: 80
   include_internal: true

status_led:
  pin:
    number: GPIO2
    inverted: true

uart:
  rx_pin: RX #GPIO3
  tx_pin: TX #GPIO1
  baud_rate: 9600

# https://esphome.io/components/tuya
tuya:
  time_id: time_hass

binary_sensor:
  - platform: status
    name: Status

sensor:
  - platform: wifi_signal
    name: WiFi Signal
    update_interval: 10s
    filters:
      - throttle_average: 60s

  # node uptime sensor
  - platform: uptime
    name: Boot Time
    id: uptime_sensor
    icon: mdi:clock-start
    type: timestamp

  - platform: "tuya"
    name: Side A Auto Off Timer
    sensor_datapoint: 28
    icon: mdi:timer-stop-outline
    entity_category: diagnostic
    unit_of_measurement: seconds

  - platform: "tuya"
    name: Side B Auto Off Timer
    sensor_datapoint: 29
    icon: mdi:timer-stop-outline
    entity_category: diagnostic
    unit_of_measurement: seconds


switch:
# Master
  - platform: "tuya"
    id: master_power_sw
    switch_datapoint: 1
    restore_mode: DISABLED
    internal: true
    on_turn_off:
      - switch.turn_off: master_preheat_sw

  - platform: template
    name: "Master Power"
    icon: mdi:car-seat-heater
    lambda: |-
      return id(master_power_sw).state;
    turn_on_action:
      - switch.turn_on: activity_btn
      - delay: 0.5s
      - switch.turn_on: master_power_sw
    turn_off_action:
      - switch.turn_off: master_power_sw

  - platform: "tuya"
    name: "Master Preheat Power"
    switch_datapoint: 8
    icon: mdi:fire
    id: master_preheat_sw
    restore_mode: DISABLED

# Side A
  - platform: "tuya"
    id: side_a_power_sw
    switch_datapoint: 14
    restore_mode: DISABLED
    internal: true
    on_turn_off:
      - switch.turn_off: side_a_preheat_sw

  - platform: template
    name: "Side A Power"
    icon: mdi:car-seat-heater
    lambda: |-
      return id(side_a_power_sw).state;
    turn_on_action:
      - switch.turn_on: activity_btn
      - delay: 0.5s
      - switch.turn_on: side_a_power_sw
    turn_off_action:
      - switch.turn_off: side_a_power_sw

  - platform: "tuya"
    name: "Side A Preheat"
    switch_datapoint: 24
    icon: mdi:fire
    restore_mode: DISABLED
    id: side_a_preheat_sw

# Side B
  - platform: "tuya"
    id: side_b_power_sw
    switch_datapoint: 15
    restore_mode: DISABLED
    internal: true
    on_turn_off:
      - switch.turn_off: side_b_preheat_sw

  - platform: template
    name: "Side B Power"
    icon: mdi:car-seat-heater
    lambda: |-
      return id(side_b_power_sw).state;
    turn_on_action:
      - switch.turn_on: activity_btn
      - delay: 0.5s
      - switch.turn_on: side_b_power_sw
    turn_off_action:
      - switch.turn_off: side_b_power_sw

  - platform: "tuya"
    name: "Side B Preheat"
    switch_datapoint: 25
    icon: mdi:fire
    restore_mode: DISABLED
    id: side_b_preheat_sw

  - platform: gpio
    pin:
      number: GPIO5
      inverted: true
    id: activity_btn
    name: "Activity Button"
    entity_category: diagnostic
    internal: true
    on_turn_on:
    - delay: 500ms
    - switch.turn_off: activity_btn


number:
  - platform: template
    name: "Side A Level"
    id: side_a_level
    step: 1
    min_value: 1
    max_value: 10
    update_interval: never
    entity_category: config
    icon: mdi:thermometer
    lambda: |-
      return std::stoi(id(side_a_level_int).state.substr(6));
    set_action:
      then:
        - select.set:
            id: side_a_level_int
            option: !lambda return "Level " + std::to_string(int(x));

  - platform: template
    name: "Side B Level"
    id: side_b_level
    step: 1
    min_value: 1
    max_value: 10
    update_interval: never
    entity_category: config
    icon: mdi:thermometer
    lambda: |-
      return std::stoi(id(side_b_level_int).state.substr(6));
    set_action:
      then:
        - select.set:
            id: side_b_level_int
            option: !lambda return "Level " + std::to_string(int(x));

  - platform: template
    name: "Master Heat Level"
    id: master_level
    step: 1
    min_value: 1
    max_value: 10
    update_interval: never
    entity_category: config
    icon: mdi:thermometer
    lambda: |-
      return std::stoi(id(master_level_int).state.substr(6));
    set_action:
      then:
        - select.set:
            id: master_level_int
            option: !lambda return "Level " + std::to_string(int(x));


select:
  - platform: "tuya"
    entity_category: config
    id: master_level_int
    enum_datapoint: 4
    internal: true
    options:
      0: "Level 1" # L
      1: "Level 2"
      2: "Level 3"
      3: "Level 4"
      4: "Level 5"
      5: "Level 6"
      6: "Level 7"
      7: "Level 8"
      8: "Level 9"
      9: "Level 10" # H
    on_value:
      then:
        - component.update: master_level

  - platform: "tuya"
    entity_category: config
    id: side_a_level_int
    enum_datapoint: 20
    internal: true
    options:
      0: "Level 1" # L
      1: "Level 2"
      2: "Level 3"
      3: "Level 4"
      4: "Level 5"
      5: "Level 6"
      6: "Level 7"
      7: "Level 8"
      8: "Level 9"
      9: "Level 10" # H
    on_value:
      then:
        - component.update: side_a_level

  - platform: "tuya"
    entity_category: config
    id: side_b_level_int
    internal: true
    enum_datapoint: 21
    options:
      0: "Level 1" # L
      1: "Level 2"
      2: "Level 3"
      3: "Level 4"
      4: "Level 5"
      5: "Level 6"
      6: "Level 7"
      7: "Level 8"
      8: "Level 9"
      9: "Level 10" # H
    on_value:
      then:
        - component.update: side_b_level

  - platform: "tuya"
    entity_category: config
    name: "Side A Set Timer"
    enum_datapoint: 26
    icon: mdi:timer
    options:
      0: 0.5 hours
      1: 1 hour
      2: 1.5 hours
      3: 2 hours
      4: 2.5 hours
      5: 3 hours
      6: 3.5 hours
      7: 4 hours
      8: 4.5 hours
      9: 5 hours
      10: 5.5 hours
      11: 6 hours
      12: 6.5 hours
      13: 7 hours
      14: 7.5 hours
      15: 8 hours
      16: 8.5 hours
      17: 9 hours
      18: 9.5 hours
      19: 10 hours
      20: 24 hours

  - platform: "tuya"
    entity_category: config
    name: "Side B Set Timer"
    enum_datapoint: 27
    icon: mdi:timer
    options:
      0: 0.5 hours
      1: 1 hour
      2: 1.5 hours
      3: 2 hours
      4: 2.5 hours
      5: 3 hours
      6: 3.5 hours
      7: 4 hours
      8: 4.5 hours
      9: 5 hours
      10: 5.5 hours
      11: 6 hours
      12: 6.5 hours
      13: 7 hours
      14: 7.5 hours
      15: 8 hours
      16: 8.5 hours
      17: 9 hours
      18: 9.5 hours
      19: 10 hours
      20: 24 hours


text_sensor:
  # version sensor
  - platform: version
    name: Firmware Version
    hide_timestamp: False
    id: version_txt

    # wifi info
  - platform: wifi_info
    ip_address:
      name: IP Address
      entity_category: diagnostic
    mac_address:
      name: MAC Address
      entity_category: diagnostic


button:
  - platform: restart
    name: Restart
    id: restart_btn
I’ve made a Home Assistant dashboard for controlling the bed as wellHome Assistant Dashboard

type: custom:vertical-stack-in-card
cards:
  - type: conditional
    conditions:
      - entity: switch.mattress_master_power
        state: "on"
    card:
      type: button
      show_name: true
      show_icon: true
      entity: switch.mattress_master_power
      icon: mdi:car-seat-heater
      show_state: true
      name: Bed Power
  - type: conditional
    conditions:
      - entity: switch.mattress_master_power
        state_not: "on"
    card:
      type: button
      show_name: true
      show_icon: true
      tap_action:
        action: call-service
        service: script.warm_bed
        service_data: {}
        target: {}
      icon: mdi:car-seat-heater
      show_state: true
      name: Preheat Bed
  - type: custom:collapsable-cards
    title: Details
    cards:
      - type: entities
        entities:
          - entity: switch.mattress_master_power
            name: Power
            icon: mdi:radiator
          - entity: number.mattress_master_heat_level
            name: Level
          - entity: switch.mattress_master_preheat_power
            name: Preheat
            icon: mdi:fire
        state_color: true
        show_header_toggle: false
      - type: custom:vertical-stack-in-card
        horizontal: true
        cards:
          - type: entities
            entities:
              - entity: switch.mattress_side_a_power
                name: A
                icon: mdi:radiator
                secondary_info: none
              - entity: number.mattress_side_a_level
                name: Level
              - entity: switch.mattress_side_a_preheat
                name: Preheat
                icon: mdi:fire
              - entity: select.mattress_side_a_set_timer
                name: Timer
                icon: mdi:clock-edit
            show_header_toggle: false
            state_color: true
          - type: entities
            entities:
              - entity: switch.mattress_side_b_power
                name: B
                icon: mdi:radiator
                secondary_info: none
              - entity: number.mattress_side_b_level
                name: Level
              - entity: switch.mattress_side_b_preheat
                name: Preheat
                icon: mdi:fire
              - entity: select.mattress_side_b_set_timer
                name: Timer
                icon: mdi:clock-edit
            show_header_toggle: false
            state_color: true