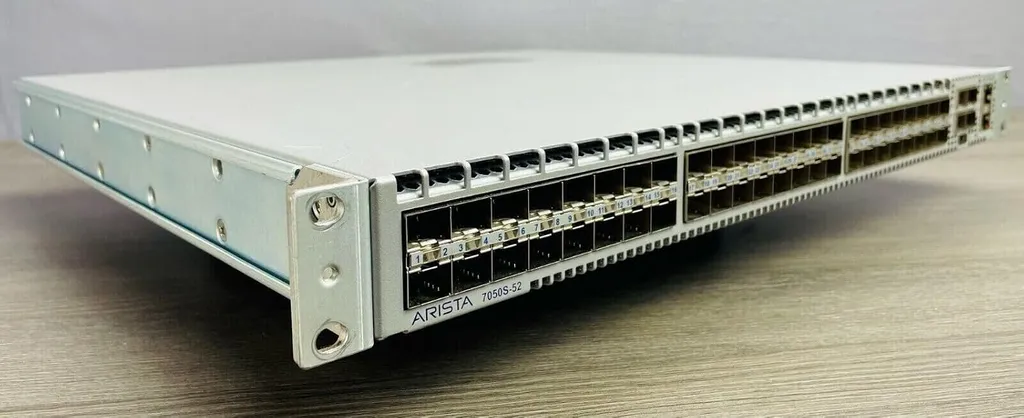
I recently received a used Arista DCS-7050S-64 from Ebay. However once it arrived and I logged in via the serial console, I could not bring up the management Ethernet interface. It reported notpresent and the system logs repeated SIOCETHTOOL GDRVINFO (ma1...): No such device. This hardware was long EOL, but before leaving the Ebay seller a bad review for selling faulty hardware I decided to see if I could fix this myself.
TLDR: The switch shipped with an incompatible bootloader/OS combination. The OS had been updated previously, but the bootloader was left much older. This resulted in some hardware such as the management interface not being configured properly on boot before the OS started. Flashing a newer bootloader fixed the issue.
If you just want the file: the Aboot 2.0.10 dump is at https://archive.org/details/arista-dcs-7050-bootloader. Read the “Upgrading Aboot” section before you write it to anything.
The Symptom
switch#show ip interface brief
Interface              IP Address         Status     Protocol         MTU
Management1            192.168.99.1/24    down       notpresent      1500

switch#show interfaces management1
Management1 is down, line protocol is notpresent (notconnect)
  Hardware is Ethernet, address is 0000.0000.0000 (bia 0000.0000.0000)
  0 link status changes since last clear
A null MAC address and no link changes indicated that the interface has not existed since boot. Additionally, Syslog logs the following about once a second:
PhyEthtool: %ETH-3-ETHTOOLFAIL: SIOCETHTOOL GDRVINFO (ma1, interface Management1): No such device (message repeated 59 times in 60.1686 secs)
The first thing I tried to no avail was a factory reset, and even rebooting to the backup OS partition (Arista switches use an A+B partition layout for recovery and upgrades).
Even inside the Linux shell within EOS, the management NIC could not be found. When I compared the PCI busses of this system and another similar model I had that was working, the controller was missing from the system’s PCI bus.
This had me concerned that this could be a hardware issue; something no amount of software hacking could fix.
However there was good news: the management NIC worked in the aboot shell! Aboot is the bootloader used for this switch. Inside the Aboot shell, ma1 was listed and responded to pings! The hardware works! It must be a software issue somewhere in EOS.
Aboot# readlink /sys/bus/pci/devices/0000:00:14.6/driver
../../../bus/pci/drivers/tg3
Aboot# ls /sys/bus/pci/devices/0000:00:14.6/net
ma1

Aboot# ip link set ma1 up; sleep 4; ip link show ma1
2: ma1: <BROADCAST,MULTICAST,UP,LOWER_UP> mtu 1500 qdisc mq state UP qlen 1000
    link/ether 00:1c:73:xx:xx:xx brd ff:ff:ff:ff:ff:ff

Aboot# ip addr add 192.168.99.1/24 dev ma1; ping -c 3 192.168.99.2
64 bytes from 192.168.99.2: seq=0 ttl=64 time=5.975 ms
64 bytes from 192.168.99.2: seq=1 ttl=64 time=0.583 ms
64 bytes from 192.168.99.2: seq=2 ttl=64 time=0.560 ms
3 packets transmitted, 3 packets received, 0% packet loss
I Was Not Alone
I searched online for this behavior, and came across two form posts from 2020. Neither were resolved.
- mgmt port issue: a 7050S with
notpresent, a zero MAC, and the identicalETHTOOLFAILline. The reply suggests swapping the cable, tryingshut/no shut, and opening a TAC case. None of that can work: the device is not on the PCI bus. - arista 7050s management port issue: a 7050S-52 on EOS 4.18.1 where, after a restart, “the management port is in unknown state” and it takes several reloads before it appears. That is Bug 2 below, on the same model and EOS branch. The thread ends with a request for more output and no answer.
Unfortunately I can’t post to the Arista form, but hopefully if these users are still having this issue, they will find this post.
The Two Different Bugs
I ended up experimenting with different EOS versions by upgrading EOS, and then the aboot bootloader. In doing so, I found what appears to be two different bugs that you can encounter based on your bootloader/EOS version.
| Aboot | EOS | Fails when | You have |
|---|---|---|---|
| 2.0.7 | 4.14 or newer | every boot, including cold power-on | Bug 1 |
| 2.0.10 | 4.18 | only after a warm reload; cold power-on is fine | Bug 2 |
| 2.0.7 | 4.18 | always fails | Bug 1 + 2 |
| 2.0.7 | 4.12 | doesn’t fail | no bug |
Bug 1: EOS 4.14+ on Aboot 2.0.7
Cause
Aboot boots EOS by sourcing a script called boot0 out of the .swi right
before kexec. From 4.14 on, that script carries a workaround for Arista
BUG69923 which brings ma1 up and straight back down before handing off. On
Aboot 2.0.7’s kernel that down calls tg3_close(), parking the chip in PCI
power state D3hot, and the EOS kernel kexec starts next will not enumerate a
device in D3hot. Every boot path runs the script, which is why power cycling
never helps.
Aboot 2.0.10 runs the identical script and the NIC survives. The difference is
the bootloader’s own kernel, 2.6.32 versus 2.6.38.8. Nothing in EOS
changed; the fix is entirely on the Aboot side.
Fix A: one line, works now
# EOS: enable, then bash
cp /mnt/flash/boot-config /mnt/flash/boot-config.bak
echo "NETDEV=lo" >> /mnt/flash/boot-config
Then reload:
switch#show ip interface brief
Management1            192.168.99.1/24    up         up              1500
Why it works: NETDEV is a documented Aboot boot-config variable; it is
in bootconfigvars in Aboot’s own /lib/functions. boot0 only touches ma1
because NETDEV defaults to ma1 when unset. With NETDEV=lo the up/down
happens on the loopback and ma1 is left in D0, never opened. Aboot’s netboot
scripts also read NETDEV, but with no NETIP or NETAUTO set they just flip
lo down and up, which is harmless.
Side effect to watch: the block you are bypassing exists to restore the MAC after a warm reload. In my testing the MAC was still correct afterwards. If Management1 ever comes up with a zero or wrong MAC, cold power cycle.
Fix B: upgrade Aboot
The real fix. See “Upgrading Aboot” below.
Bug 2: EOS 4.18 loses the NIC on every warm reload
This one survives the Aboot upgrade. Cold power-on: Management1 works. Any
warm reload: it comes back notpresent and stays that way through further
reloads and even a BIOS-level reboot from the Aboot shell. Only cutting
power restores it.
Cause
EOS 4.18’s kernel power-gates the management MAC at shutdown, and 4.18 reloads by kexec straight into Aboot with no hardware reset, so nothing re-initializes the chip. EOS 4.14 takes the same kexec path and leaves it visible, so this is 4.18 kernel behavior.
It is worse than Bug 1: 0000:00:14.6 is off the PCI bus entirely rather than
parked in D3hot, so even Aboot cannot see it. A PCI rescan, scanning the SB800’s
device-enable bits through /dev/port, and a BIOS-level reboot all fail to
bring it back. Nothing in 4.18 downs ma1 at shutdown, no ifcfg-ma1, etc…
Fix: Wake-on-LAN keeps the chip powered
With ethtool -s ma1 wol g set before the reload, the driver’s power-down path
keeps auxiliary power on. After a warm reload Aboot sees ma1 in D0 and EOS
comes up with Management1.
WoL resets to d on every boot, so re-apply it from /mnt/flash/rc.eos, which
EOS runs at each boot:
#!/bin/sh
# Keep the SB800 management NIC (ma1) visible across warm reloads on EOS 4.18.
for i in 1 2 3 4 5 6 7 8 9 10; do
  if ip link show ma1 >/dev/null 2>&1; then ethtool -s ma1 wol g && break; fi
  sleep 3
done
Then chmod 755 /mnt/flash/rc.eos. Check it took with
sudo ethtool ma1 | grep Wake-on - noting that it prints both
Supports Wake-on: g (a capability) and Wake-on: g (the current setting).
You want the second one; an unpatched boot shows Wake-on: d.
This works but is not a great solution. It feels more like a hack, but it gets the job done.
Possible Cleaner Alternative, (untested)
EOS 4.14.6M on Aboot 2.0.10 came back from a warm reload with no workaround at all. These are likely the versions that are meant for each other. Some version between 4.14 and 4.18 is probably the newest one whose kernel does not do this. I did not have the images to test this.
Upgrading Aboot
Aboot releases are gated behind the Arista support contract (a form of a paywall) which I do not have. Additionally them being EOL reduces the chance of the firmware still being available for download even with access.
Two ways around this: grab the archived image from the Internet Archive item and skip ahead to “Double Check the Dumps”, or, if you have a second switch of the same platform already running a newer Aboot, copy the image out of it with Arista’s own tools, which is what the rest of this section describes.
Check the platform matches first, on both switches, with
bash tr ' ' '\n' </proc/cmdline | grep platform= and
show version detail | include Aboot-. Both of mine were platform=raven,
Aboot family norcal2.
Flash Layout (NorCal2 / raven)
Both switches as the same SPI flash chip: SST25VF064C, 8 MB SPI, memory-mapped at physical 0xFF800000. The
layout is hardcoded in Arista’s /usr/bin/flashUtil (the package Aboot-utils,
already on every EOS install as well as flashrom and nvramtool).
| Offset | Size | Region | Notes |
|---|---|---|---|
0x000000 | 4 MB | fallback | coreboot + Aboot, fallback copy |
0x3F0000 | 64 KB | prefdl | board identity: CPU card serial, MAC range. Never copy between switches |
0x400000 | 4 MB | image | coreboot + Aboot, normal copy. This is what flashUtil -w image writes |
0x7F0000 | 64 KB | bootblock | reset vector; picks normal vs fallback. Identical between 2.0.7 and 2.0.10 |
Why this is reasonably safe: only the normal copy is rewritten. The
bootblock and the fallback copy stay intact, so coreboot can still boot the old
fallback image if the new one fails. And flashUtil -w image is Arista’s own
upgrade mechanism, not a third-party hack.
It would be ideal to find the right aboot flasher from Arista. I only proceeded through this more dangerous path because I had no access to the official bootloader images. If you do have access to them, this method is not for you. (and please share them with me and others to save us this risk)
Back Up the Target
EOS bash on the switch you are upgrading:
cd /mnt/flash
sudo flashUtil -n                               # chip name: SST25VF064C
sudo flashUtil -r image aboot-OLD-image.bin     # 4 MB, ~17 s
sudo flashUtil -r total aboot-OLD-total.bin     # 8 MB, ~33 s
md5sum aboot-OLD-*.bin
Check you have room first; /mnt/flash on mine was 88% full. Copy both off the
switch. The total file is your disaster copy for an external SPI programmer; it
contains this board’s prefdl, so it is the correct full image for this switch
and no other. The image file is what flashUtil -w image restores from EOS.
Read the Donor Switch’s Bootloader
Skip this if you downloaded the archived image; go to “Double Check the Dumps” and check its md5.
The chip is memory-mapped, so a plain read of /dev/mem returns the whole
8 MB. This never touches the SPI controller or the chipset’s write-enable bit,
which is what made it acceptable to run on a production switch.
bash sudo dd if=/dev/mem of=/tmp/aboot-NEW-total.bin bs=1M skip=4088 count=8
md5sum /tmp/aboot-NEW-total.bin
skip=4088 MB = 0xFF800000. The file lands in RAM and vanishes on the
donor’s next reboot, so copy it off and verify the md5.
I validated the method on the target first, where it could be compared
against a real flashUtil read. Byte-identical, and the dd slice of the
total matches the image read exactly, which also confirms the region math:
7a0409b774c9d557bcb0832972b85624  aboot-2.0.7-total.bin     <- via flashUtil
79b5c7ae8f475ed0304d21eb94e6cf6c  aboot-2.0.7-image.bin     <- via flashUtil
Double Check the Dumps
# version strings: expect two hits, one per copy (image + fallback)
grep -a -b -o "Aboot-norcal2-2\.0\.[0-9]*-[0-9]*" aboot-NEW-total.bin | sort -u

# cut the image region: 63 x 64 KB starting at block 64 = 0x400000..0x7EFFFF
dd if=aboot-NEW-total.bin bs=65536 skip=64 count=63 of=aboot-NEW-image.bin
ls -l aboot-NEW-image.bin        # must be exactly 4128768 bytes
Then compare regions between the old and new dumps. Bootblock should be identical; prefdl and both Aboot regions will differ:
a = open("aboot-OLD-total.bin", "rb").read()
b = open("aboot-NEW-total.bin", "rb").read()
R = {"fallback": (0, 0x3F0000), "prefdl": (0x3F0000, 0x10000),
     "image": (0x400000, 0x3F0000), "bootblk": (0x7F0000, 0x10000)}
for k, (s, l) in R.items():
    print(k, "SAME" if a[s:s+l] == b[s:s+l] else "DIFF")
If the bootblock differs, stop. I did not test that case. ;)
Write the Image Region
Get aboot-NEW-image.bin onto the target’s flash, verify its md5 there with
verify /md5 flash:<file>, then:
sudo flashUtil -v -w image /mnt/flash/aboot-NEW-image.bin
flashUtil builds an 8 MB zero buffer, places the 4 MB image at 0x400000,
and runs flashrom with a layout file and -i image, so only that region is
erased and written. Do not remove power or reload until it prints
Erase/write done and returns 0:
Using region: "image".
Found chipset "AMD SB7x0/SB8x0/SB9x0". Enabling flash write... OK.
Found SST flash chip "SST25VF064C" (8192 kB, SPI) at physical address 0xff800000.
Reading old flash chip contents... done.
Erasing and writing flash chip... Erase/write done.
write rc=0
Using region: "image" is the line that tells you only 0x400000..0x7EFFFF is
in play. If that says anything else, stop.
This took me about 5 minutes. During this process the switch keeps working normally. This process only writes to the bootloader. It will have no effect on the running state until the next switch reboot.
Verify the Write
sudo flashUtil -r total /tmp/after-total.bin
Run the same Python snippet against aboot-OLD-total.bin:
prefdl    unchanged-from-2.0.7=True
bootblk   unchanged-from-2.0.7=True
image     unchanged-from-2.0.7=False      <- the only region that moved
fallback  unchanged-from-2.0.7=True
('image == 2.0.10 source:', True, '3621da50909a8b00bee9b7a3d56201e7')
prefdl unchanged=True is the important one: the switch still has its own
serial number and MAC range. fallback unchanged=True is your safety net.
Reboot and Confirm
Remove the workaround from /mnt/flash/boot-config if you added it previously (eg: the NETDEV=lo line)
then reload. The banner should show the new version, and Management1 should
come up on a plain boot-config!
Aboot 2.0.10-1458058                     <- was 2.0.7-667020

switch#show interfaces management1 | head -2
Management1 is up, line protocol is up (connected)
  Hardware is Ethernet, address is 001c.73xx.xxxx (bia 001c.73xx.xxxx)

switch#show version detail | include Aboot-
Aboot      Aboot-norcal2-2.0.10-1458058
Rollback
If something failed or went unexpectedly wrong, follow these steps to revert to your prior bootloader:
- From EOS:
sudo flashUtil -w image /mnt/flash/aboot-OLD-image.bin, reload. - If the normal image won’t boot: coreboot should fall back to the untouched fallback copy on its own. Then restore from EOS as above.
- Worst case, nothing boots: program
aboot-OLD-total.binonto the SOIC-8 SPI chip with a clip programmer. That file contains your own board’s prefdl, so it is the correct full image for that specific board.
Download
I uploaded the aboot bootloader images I took from both switches to: https://archive.org/details/arista-dcs-7050-bootloader
Arista restricts bootloader downloads to accounts with a support contract, and this hardware is long past end-of-sale. If you have one of these switches and have no donor to copy from, this is the file you need.
| File | Size | MD5 |
|---|---|---|
aboot-2.0.10-image.bin | 4128768 | 3621da50909a8b00bee9b7a3d56201e7 |
aboot-2.0.7-image.bin | 4128768 | 79b5c7ae8f475ed0304d21eb94e6cf6c |
Both are the 4 MB image region at 0x400000 only, platform=raven / Aboot
family norcal2. The 2.0.10 came off a DCS-7050S-52 running EOS 4.18.11M and
was written to a DCS-7050S-64, which booted it. Verify before writing:
md5sum aboot-2.0.10-image.bin    # 3621da50909a8b00bee9b7a3d56201e7
ls -l  aboot-2.0.10-image.bin    # 4128768
These are image slices, not full chip dumps. That region contains no prefdl,
so it carries no serial number and no MAC range from the switch it came off,
which is exactly why this slice is safe to share and a full dump is not. If you
make your own dumps, keep the total files private.
2.0.7 is the broken older version, published only as a reference to diff your own
dump against, or to be used if you need a version for an even older EOS build,
or as a rollback source if you flashed without a backup. Your
own backup is still better, because the image region also carries the
coreboot build that shipped with your board.
As far as I can tell 2.0.10 appears to be the newest Aboot available for this hardware. It came off a live production switch; I have no way to check Arista’s release list without a support account. If you know of a newer one, tell me and I will add it to the archive.
What was Tested
All of this happened on one target switch: a DCS-7050S-64 on Aboot 2.0.7-667020
running EOS 4.12.0 (unaffected), then 4.14.6M, then 4.18.11M-2GB. The donor was
a DCS-7050S-52 on Aboot 2.0.10-1458058; both are platform=raven. The
NETDEV=lo workaround was tested across warm reloads and cold power cycles
with the MAC correct after each, the Aboot upgrade on one switch, and the WoL
rc.eos fix across 3 consecutive unattended warm reloads.
Everything else is untested. I would expect the image to be good across the
7050S line since it already crossed from a *-52 to a *-64, but that is an
assumption; other 7050 variants and other Arista platforms may
not share the norcal2/raven image, so check the platform string before
you write anything. Aboot versions other than 2.0.7 and 2.0.10 probably show
the same D3hot behavior, unverified. Where Bug 2 starts between 4.14.6M and
4.18.11M is unknown; one of those releases may need no workaround at all. And
if your bootblock differs between versions, then this solution may not work for you.
Bonus: Reversing the Fan Direction on a 7020S
Completely unrelated to the bootloader issue, but worth knowing if you are buying used Arista gear: these switches come in two different airflow directions, front-to-rear and rear-to-front, and the direction is fixed by which fan kit is installed. Order the wrong one off eBay and you end up pushing hot air the wrong way through your rack.
The usual advice is to buy the fan kit for the other direction. On EOL hardware that is both expensive and hard to find, and it turns out to be unnecessary. The fans inside these modules can be turned around by hand. Drone Fyre on YouTube has a short showing the whole process on a 7020S:
Do not forget the power supplies. They have their own fans, and they need to pull air in the same direction as the fan modules, so reversing only the fan kit leaves the PSUs fighting the rest of the chassis. The good news is that they come apart the same way and the fans inside flip just as easily.
EOS reads the airflow direction from the fan module and PSU themselves, not
from the fans inside them, so after a manual reversal both will keep reporting
whichever direction they shipped as. Check show system environment cooling
afterwards and label the chassis, because the software will not tell you which
way the air is actually moving.