This guide will tell you how to let a windows computer make use of your N810’s GPS as if it was its own. While the Nokia N810 does not have the best GPS in the world it is still better than no GPS. On a recent road trip I wanted a way to visualize my trip route on a more powerful device than my N810’s 400MHz processor and Maemo Mapper. I wanted the full use of my laptop, Google Earth and the Internet.
Preparing The Tablet
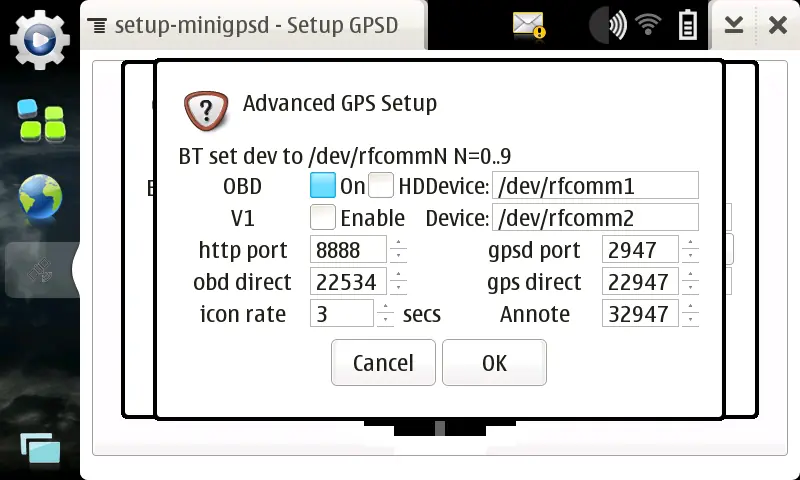
The built in GPS software does not allow us do do anything advanced like this. We will be using Minigpsd as a replacement for the built in GPS interface software. Minigpsd allows for many more advanced options for the GPS, and may even assist in getting locks faster. Install Minigpsd from the above link. After the installation is complete open up the settings and click the “Advanced” button. Here you will be able to see and set the ports Minigpsd communicates on. You can either leave them at their defaults or change them however you see fit. Below is a screenshot of my configuration.

Now you need to network the Tablet and your Computer. In my case (On a road trip) I was unable to have an access point around, especially in a moving car. So I used an Ad-Hoc Wireless network. But you can use any method you want, including Bluetooth Pan or over your cellular network. I will not go into how to set this up here.
Preparing The Computer
Assuming that your computer is now networked to your N810 you will need software than can take the GPS data from the N810 over the network and bring it to the computer in a form it can use. The best software that I could find that does this is HW Group’s Virtual Serial Port. This software will take the GPS data and make a virtual serial port. From your computer’s point of view it will think that there is a serial GPS attached to it.
Simply start up the virtual serial port software and create a new virtual serial port. It will need an IP address and port. the IP is the IP of your tablet and the port is the “gps direct” port. In the above example it is 22947. Once the port is created make sure your N810 is on, able to ping it from your computer, and GPSD is running.
Testing It Out
Your computer should now see your N810 as a RAW serial GPS device. To test it out install some GPS aware software. I used Google Earth.
On Google Earth open Tools -> GPS -> Real Time you should see the following:
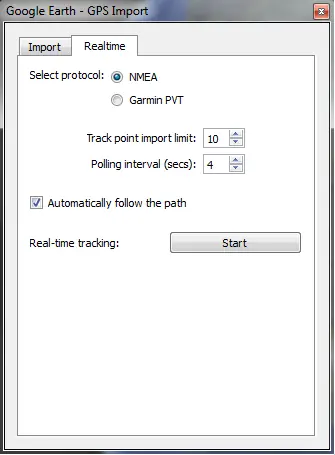
If you want to start tracking of the N810, click start. You can change the frequency of the position updates by changing the “Polling interval”.
An alternate method of setting this up without the use of any serial-port emulator on the computer is to use Google Earth’s Network Link function. This will allow Google Earth to look on the N810 for a kml file containing its current longitude and latitude, and use that instead. This KML file can be found on GPSD’s internal web server. On the above example we can see I have it set to run on port 8888. Below is my example configuration:
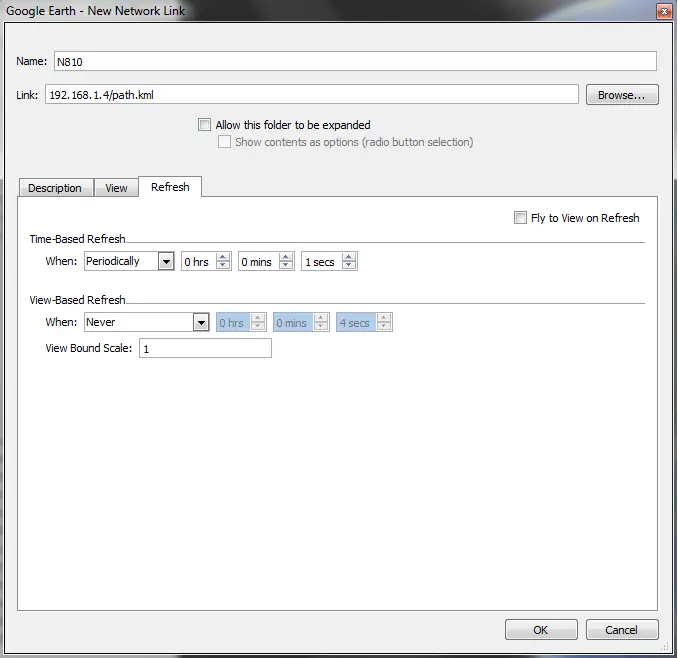
I suggest you uncheck “Allow this folder to be expanded” because this file will only contain one updating set of points. also, if you want to use this for real time tracking set the “Time-Based Refresh” to Periodically, and the number of seconds you want between updates. the lower the more smooth the movement will appear.
This concept should work with any GPSD compatible device, including other computers and some modern cell phones. And is in no way limited to Google Earth. I have also tested it with NetStumbler and inSSIDer.